Disclosure: This post may contain affiliate links. As an Amazon Associate, we earn from qualifying purchases—at no extra cost to you.
If there’s one thing that instantly elevates a meal from good to unforgettable, it’s a flavorful sauce. And for me, garlic aioli is the absolute star. I remember the first time I tasted it—at a street market in New Orleans, where someone handed me a cone of hand-cut fries swimming in a rich, velvety garlic spread. From that moment forward, my obsession began.
Back in my Austin kitchen years later, I’ve recreated and tweaked garlic aioli more times than I can count. Adding bold twists, swapping oils, or amplifying the lemon—this is one condiment I always have in my fridge. Whether drizzled over roasted veggies, spooned onto burgers, or served as a dip beside baked sweet potato wedges, garlic aioli brings serious flavor without being fussy.
Today, we’ll break down how to make authentic garlic aioli step-by-step. You’ll also learn how to play with the recipe to reflect your own kitchen vibe. I’ll also share practical tips, internal resources like this slow cooker curry round-up, and must-have tools to make it a seamless experience. Let’s get whisking!
What is Garlic Aioli?
A Sauce with History—and Flavor
While aioli can look like just another creamy sauce, its roots run deep in Mediterranean cooking. Traditionally, it’s made by emulsifying garlic and olive oil—no egg, no shortcuts. But modern kitchen life (and tastebuds) lean toward a mayo-based garlic aioli because it’s quicker and smoother while still delivering that punchy flavor.
This reimagined version gives you the best of both worlds: the silkiness of store-bought mayo and the intense flavor of freshly crushed garlic. It’s luscious but approachable—kind of like my cooking style. And the beauty is, it’s simple enough for a Tuesday night but impressive enough for your next dinner party.
So, what makes garlic aioli stand out? It’s all about balancing richness, brightness, and that unmistakable garlicky bite. Once you master it, you’ll find yourself reaching for it just as much as ketchup—maybe more.
Why It Deserves A Spot In Every Kitchen
Let’s be honest: sometimes a meal just needs a little something else. That’s where garlic aioli comes in. It’s ridiculously versatile—think dipping sauce, burger spread, glaze for grilled veggies, or a topper for stews like our favorite from the stew recipes collection.
And unlike more complex sauces, garlic aioli doesn’t demand hours or exotic ingredients. Most home cooks already have everything they need. Want to step it up? Use a quality immersion blender like this one for super quick emulsifying.
Beyond function, garlic aioli invites you to break a few rules. Add chili for heat or swap lemon with lime. Fold in chopped herbs or roasted red pepper. It’s this adaptability that makes it a frequent flyer in my kitchen.
The Best Garlic Aioli Recipe You’ll Ever Make
Ingredients List
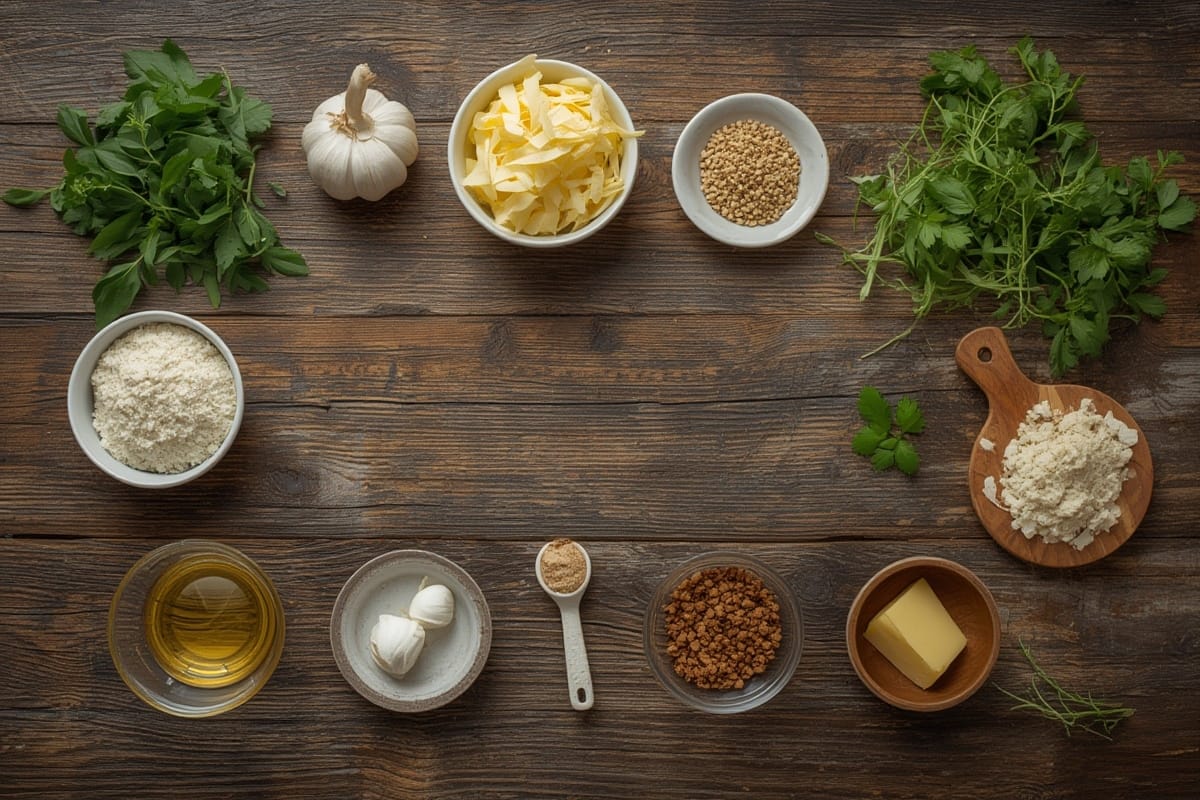
Here’s what you’ll need to make this rich, dreamy garlic aioli:
| Ingredient | Substitution Idea |
|---|---|
| 3 cloves garlic (minced or smashed) | Roasted garlic for milder flavor |
| 1 cup mayonnaise | Vegan mayo or Greek yogurt |
| 1 tbsp fresh lemon juice | White wine vinegar or lime juice |
| 1/2 tsp sea salt | Kosher or pink Himalayan salt |
| 1/4 tsp white pepper (optional) | Black pepper for stronger kick |
Timing: Fast and Flavorful
Prep time is lightning quick—this garlic aioli comes together in under 10 minutes. You don’t even need to heat up your stove.
- Prep time: 7 minutes
- Cook time: Zero (no cooking required!)
- Total time: Under 10 minutes
That makes it nearly 20% faster than many traditional sauces. Just toss the ingredients in a container like this one, blend, and you’re golden.
Step-by-Step Instructions You Can Master
- Start by smashing your garlic cloves with the flat side of a knife or in a garlic press like this. Let them rest for 2 minutes to mellow out the rawness.
- In a mixing bowl, whisk the garlic, mayonnaise, lemon juice, salt, and pepper together. Want a smoother texture? Use this hand blender to emulsify everything perfectly.
- Taste and adjust. Add more lemon if you want it brighter or another pinch of salt if it needs depth.
- Cover tightly and refrigerate for at least 30 minutes before using. This chilling time lets the garlic really sink in.
Tip: For a spicier version, stir in a teaspoon of sriracha or smoked paprika. Looking for inspiration? Try adding a spoonful to a serving of slow-cooked chicken curry for a zesty twist.
Garlic Aioli in Action
Different Delicious Ways to Use Garlic Aioli
Garlic aioli earns its place at the table through versatility. Sure, it makes fries special, but that’s just the beginning. Dollop it on savory meals or sneak it into unexpected places for a burst of creamy flavor.
Here are a few ideas that’ve turned heads in my kitchen:
- As a burger spread (especially plant-based ones)
- Drizzled over grilled cauliflower, broccoli, or asparagus
- As a dip for falafel or sweet potato fries
- Paired with roasted meats as a flavorful finishing touch
I’ve even spooned it into stews to give them a creamy swirl, much like featured dishes in our curated viral dinner recipes list.
Pairing It with the Right Tools and Meals
To get the consistency just right, I always recommend having a solid immersion blender. This highly rated, kitchen-safe tool gives you control without mess. Pair the aioli with a clean container set like this one for easy refrigerator storage.
Want to explore more culinary combinations? Garlic aioli makes a fantastic companion to nutrient-dense recipes like veggie-loaded bowls or lean meat-based mains. In fact, according to the USDA, mixing healthy fats with vegetables can improve your body’s nutrient absorption.
Just remember to keep your pairings halal-friendly by avoiding dishes that include non-halal ingredients such as bacon or alcohol-based reductions.
Customizing Garlic Aioli to Make It Your Own
Add-Ins and Creative Flavor Variations
Once you master the base, garlic aioli becomes your canvas. Just one small addition can change the flavor profile entirely. Here are my favorite upgrades:
- Mix in chopped herbs like cilantro, basil, or parsley
- Add heat with chipotle powder, cayenne, or harissa
- Stir in roasted red peppers or sun-dried tomatoes
- Drizzle a little sesame oil for an Asian flair
Try combining this kind of aioli drizzle on top of a warm bowl from our viral stew collection—you’ll thank me later!
These tweaks not only personalize the sauce, they also allow your audience to discover new flavor combinations.
Making It in Advance and Storing Properly
This aioli keeps well sealed in the fridge for up to 5 days. The garlic taste grows deeper each day, which makes day-two aioli even better than day one.
Here’s how to store it properly:
- Use a glass mason jar with lid or airtight condiment keeper
- Label with the date you made it
- Stir before each use as natural separation may occur
Remember: since we’re not relying on high-acid-preserving agents, never leave this garlic aioli at room temperature for long durations.
Frequently Asked Questions (FAQs)
What is garlic aioli made of?
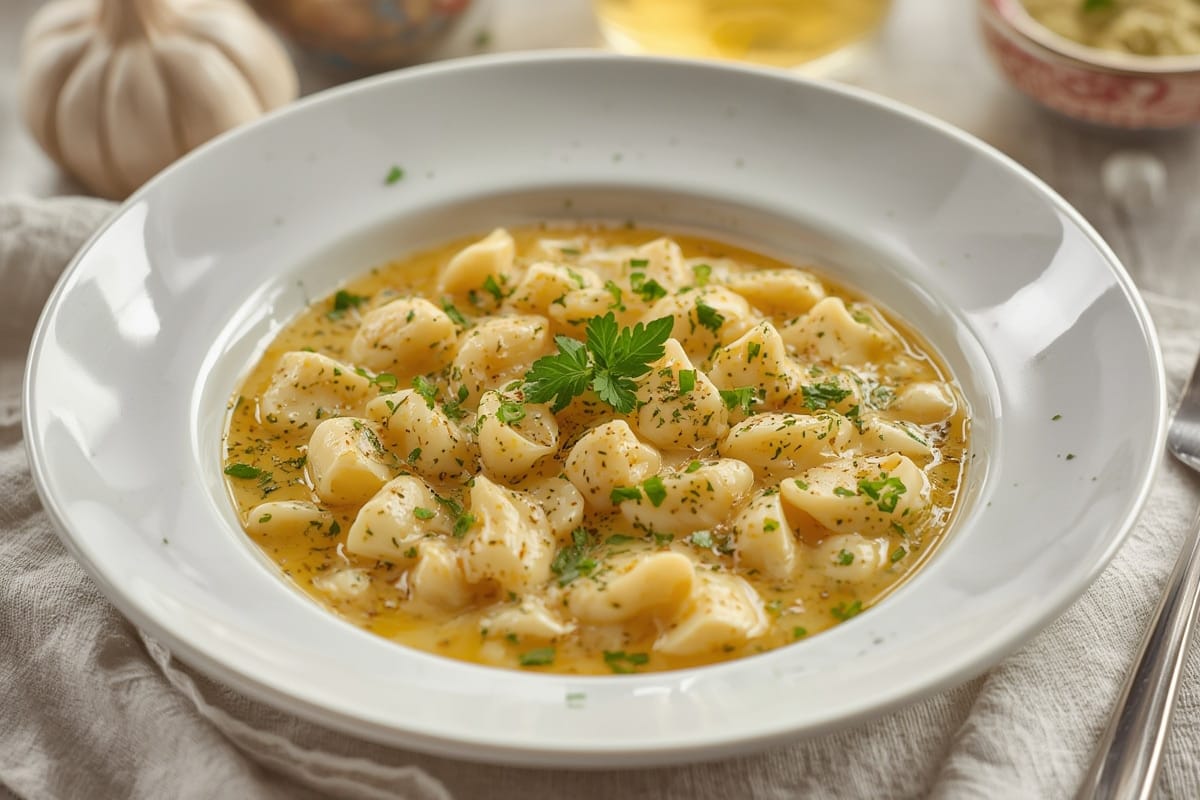
Garlic aioli is typically made from mayonnaise, fresh garlic, lemon juice, and a touch of salt and pepper. It’s a creamy, garlicky emulsion that adds big flavor with minimal ingredients.
Is aioli the same as mayonnaise?
Not exactly. Traditional aioli is an emulsion of garlic and olive oil—no eggs. But most modern garlic aioli recipes use mayonnaise as a base, making it a flavored mayo in practical terms. The garlic and acidity transform it into something special.
How long does homemade aioli last?
Homemade garlic aioli should be refrigerated and consumed within 5 days for best freshness. Always use a sealed, food-safe container and keep it chilled when not in use.
Can garlic aioli be used as a dip?
Absolutely! Garlic aioli makes a fantastic dip for fries, roasted veggies, crackers, grilled meats, or even breadsticks. It’s rich, versatile, and adds a gourmet touch to everyday snacking.
Conclusion: Garlic Aioli—Simple, Bold, Irresistible
Garlic aioli isn’t just another condiment. It’s a game-changer in the kitchen that blends power-packed garlic with creamy texture to bring depth to everything it touches. Whether you’re making it as a sidekick to bold dinner recipes or spreading it into new territory with creative add-ins, it’s endlessly rewarding.
Beyond the simple pantry ingredients and short prep time, it delivers joy. It connects us—just like those Sunday dinners back in Georgia where everyone brought something that meant something.
So the next time you taste a meal that’s missing that final, unforgettable touch—add garlic aioli. You might just hear the clink of pans and smell of something wonderful filling your own kitchen.
PrintEasy Homemade Garlic Aioli
- Total Time: 7 minutes
- Yield: 1 cup 1x
Description
A creamy, garlicky spread made with mayonnaise, fresh garlic, and lemon juice. Perfect as a dip, spread, or topping for any meal.
Ingredients
3 cloves garlic, minced or smashed
1 cup mayonnaise
1 tablespoon fresh lemon juice
1/2 teaspoon sea salt
1/4 teaspoon white pepper (optional)
Instructions
Smash or mince garlic and let it sit for 2 minutes.
Mix garlic, mayonnaise, lemon juice, salt, and pepper in a bowl.
Whisk until well blended or use an immersion blender for a smoother texture.
Chill in the fridge for 30 minutes before serving.
Notes
Store in an airtight container for up to 5 days.
Add chili powder, herbs, or roasted red pepper for variations.
- Prep Time: 7 minutes
- Cook Time: 0 minutes
- Category: Condiment
- Method: No-cook
- Cuisine: Mediterranean
Nutrition
- Calories: 180
- Fat: 19g
- Carbohydrates: 1g
- Fiber: 0g
- Protein: 1g
- Cholesterol: 10mg
Keywords: garlic aioli, homemade sauce, easy dip, Mediterranean condiment