Disclosure: This post may contain affiliate links. As an Amazon Associate, we earn from qualifying purchases—at no extra cost to you.
Few desserts strike the perfect balance between nostalgic comfort and modern ease the way an icebox cake does. In this guide, we’ll dive deep into the story, variations, ingredients, and preparation of the iconic icebox cake. From how it got its vintage name to step-by-step directions plus popular flavor options (including a few fresh twists), this piece covers it all. Whether you’re making one for a summer potluck or just want to whip up a quick no-bake treat, this guide was made for you—and your taste buds.
From Georgia Kitchens to Internet Favorites: Why Icebox Cake Endures
My Southern Sunday Inspiration
I first met the magic of an icebox cake on a humid Sunday afternoon in my Aunt Edna’s kitchen in Georgia. The fan barely made a dent in the heat, but nobody cared—because tucked away in her fridge was a dessert so cold, so creamy, it silenced every hungry cousin in the room. Built with graham crackers, whipped cream, and fresh banana slices, it emerged from that old Frigidaire like a celebration in a pan. Something about how the layers melded together overnight—soft, rich, not too sweet—felt like quiet Southern genius.
Restaurants taught me refinement, but home taught me truth—and the icebox cake has remained part of that truth ever since.
What Makes an Icebox Cake So Iconic?
The classic icebox cake dates back to the 1920s, when refrigerators (known then as “iceboxes”) started becoming household staples. Savvy marketers included easy no-bake recipes on cookie and cracker boxes, and families across America followed suit.
No baking pans or ovens required—just layers of cookies or crackers, whipped cream, and time. As it chills, everything softens into something beautifully sliceable.
Today, the internet loves new spins on it. Think viral no-bake lemon bar cheesecake or layered raspberry cheesecake, both riding the same convenience-first wave. But the core idea remains the same: create something satisfying without sweating over a stove.
And that’s why this old-school favorite is trending all over again.
How to Make an Icebox Cake That’s Creamy, Dreamy, and Easy
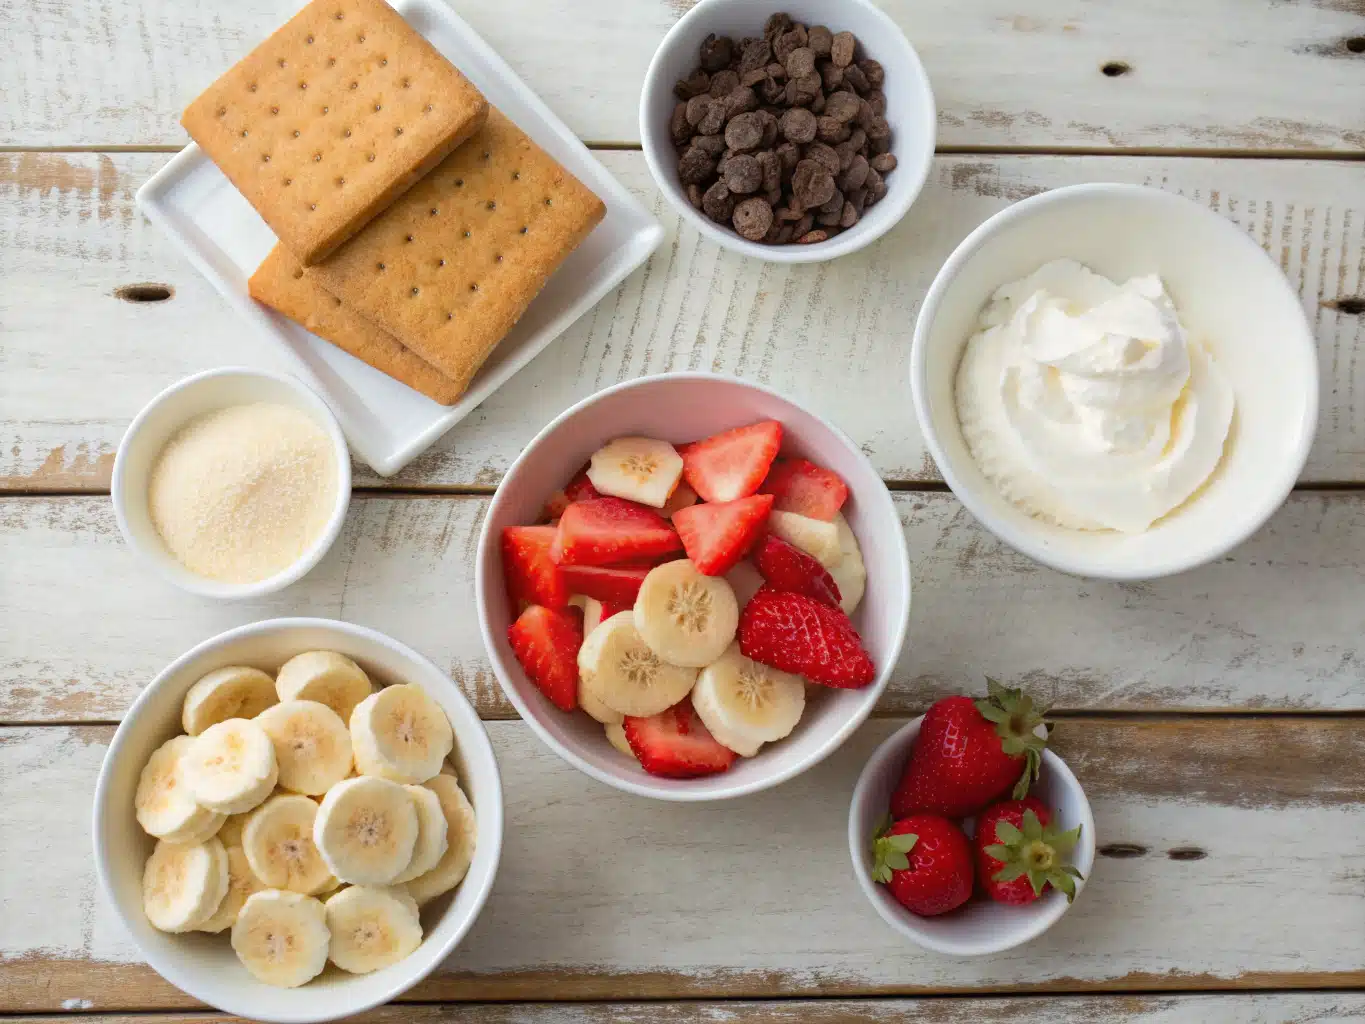
Classic Ingredients—With Room to Flex
Here’s a base recipe you can customize, tweak, or remix depending on what’s in your pantry.
| Ingredient | Notes/Substitutions |
|---|---|
| 2 cups heavy whipping cream | Or use coconut cream for a dairy-free version |
| 1/4 cup powdered sugar | Optional—but adds structure and sweetness |
| 1 tsp vanilla bean | Almond or lemon extract also works |
| 1 box graham crackers or chocolate wafers | Use gluten-free cookies if needed |
| Fruit or flavor additions | Optional: strawberries, bananas, lemon zest, etc. |
This dessert welcomes experimentation. I’ve swirled in espresso powder, added cookie skillet crumbles, even drizzled caramel across layers for extra indulgence.
Chill Time: Fast Prep, Big Payoff
Creating an icebox cake is refreshingly simple and speedy. Here’s what your timeline looks like:
- Prep time: 15 minutes
- Chill time: 4 to 6 hours (overnight yields best texture)
- Total time: Under 20 minutes active, then patience
Compared to most baked cakes requiring more than 90 active minutes, you’re cutting your workload by nearly 80%. That’s real kitchen freedom.
Let’s Make It: Easy Instructions for Success
- Whip cream, vanilla, and sugar together until stiff peaks form.
- Spread a thin layer of whipped cream on the bottom of a loaf or square pan to anchor.
- Add a layer of graham crackers or wafers.
- Spread whipped cream over the crackers. Add fruit or flavoring here if desired.
- Repeat layers at least 3 times, finishing with whipped cream on top.
- Optional: garnish with shaved chocolate, crushed pretzels, or peanut butter pretzel clusters for crunch.
- Cover tightly and refrigerate at least 4 hours or overnight.
Tip: Use a serrated knife dipped in hot water for clean slices.
Variations of an Icebox Cake You Should Try
Chocolate Lover’s Heaven
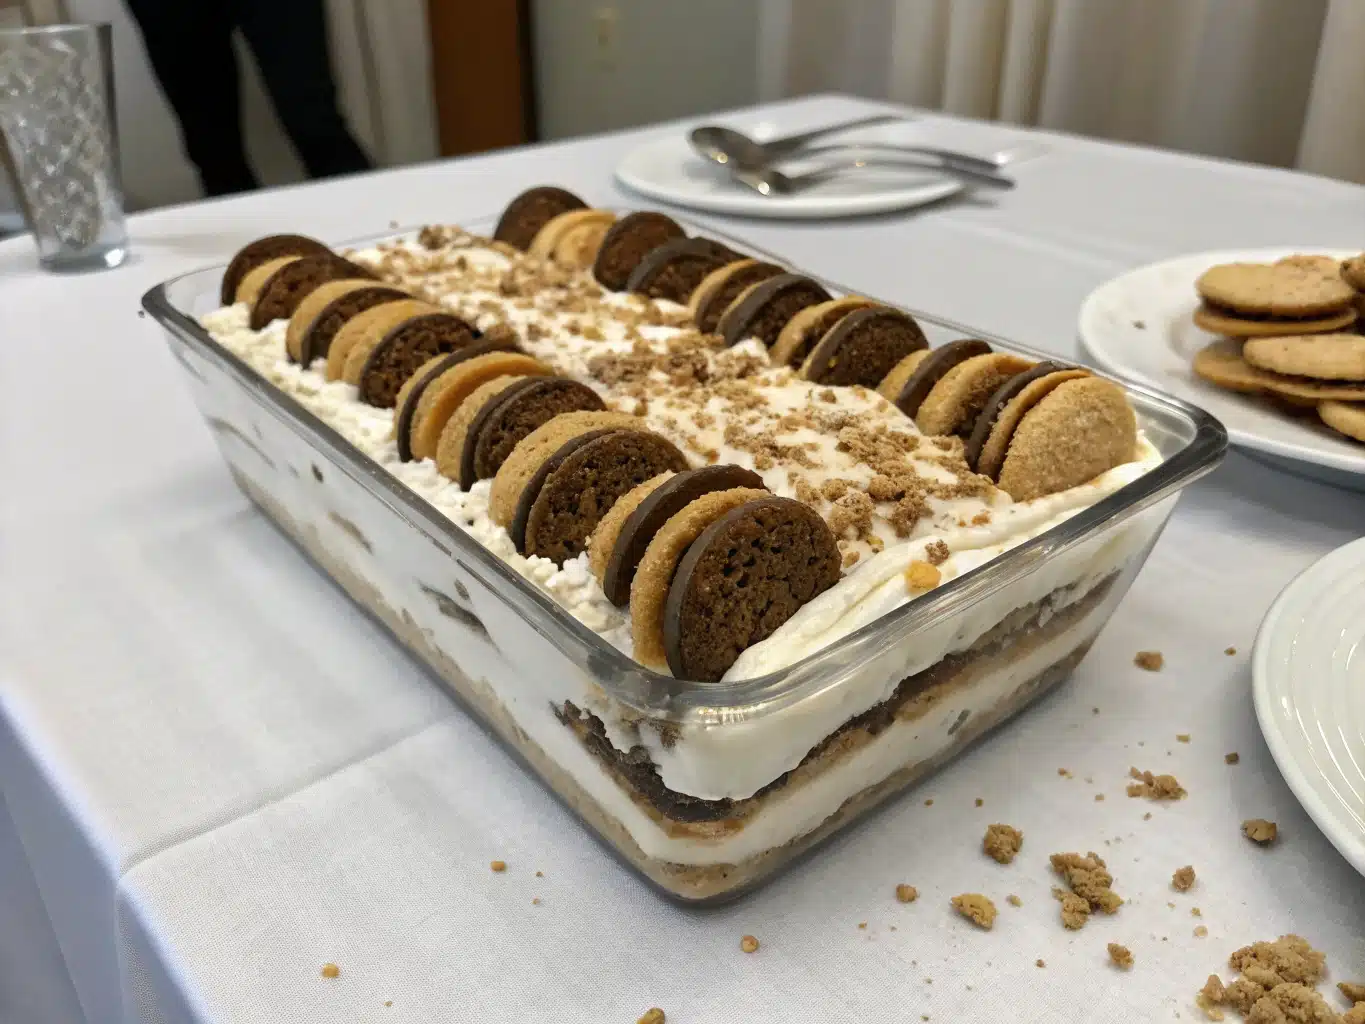
Chocolate isn’t the only option for an icebox cake—but it’s the one that started it all. Nabisco’s famous version layers chocolate wafers with whipped cream before chilling into a rich, airy dessert that’s like a chilled mousse in sliceable form.
Today, I’ve leveled it up. I add a touch of Kahlúa to the whipped cream. For crunch and contrast, sometimes I’ll crumble a yogurt bark on top. The balance of creamy, boozy, crisp… It’s everything a no-bake dessert should be.
Want to skip the wafers? Use brownie thins or even Oreos. Texture’s slightly different, but flavor impact is huge.
Fruity & Festive Twists
Summer calls for bright flavors. A lemon-blueberry version with thin lemon cookies and silky lemon curd takes the cake (pun fully intended). Layer with zest and fresh berries.
Another hit? Pumpkin spice. I use gingersnaps as my base and fold cinnamon and pumpkin puree into the whipped cream for a seasonal spin that parallels my favorite pumpkin cheesecake recipe.
These variations show how adaptable the format is. Whether you’re aiming for cozy or tropical, the icebox cake is your blank canvas.
The Science Behind the Chill
Why Chilling Changes Everything
Let’s talk culinary chemistry—because that chill time? That’s not just for setting. As the whipped cream hydrates the dry cookies or crackers, they soften into a cake-like consistency without ever turning mushy. This technique, called “refrigerated hydration,” is what turns a mound of separate ingredients into one cohesive dessert.
According to a helpful USDA guide on refrigerating leftovers safely, whipping cream and dairy-based desserts should stay chilled below 40°F to prevent spoilage. It’s not just safe—it’s optimal for the texture you’re aiming for.
You’ll notice higher structure and flavor depth the longer it chills. Don’t rush it.
Tools Make the Difference
No fancy gadgets required—but a few tools help:
- Metal bowl: Chilled bowls whip cream faster
- Offset spatula: Gets smoother layers
- Loaf or glass dish: Makes beautiful slices visible from the sides
If you’re making a batch to take to a gathering, a disposable aluminum pan works great. Just wrapping the top tightly keeps the moisture in and the layers intact.
Need dessert dips too? Pair slices with easy caramel dip for a party board effect.
FAQs: All About Icebox Cakes
Why is it called an icebox cake?
It’s named after the “icebox,” the pre-refrigerator cooling units used in the 1920s and 30s. These cakes were made to be stored in the icebox, allowing the layers to soften and chill without baking.
Is icebox cake always chocolate?
Not at all. While the original version used chocolate wafers, modern takes range from lemon and berry to peanut butter and pumpkin. The only rule is: no baking.
Does icebox cake go in the fridge or freezer?
Always the refrigerator. The texture comes from slow chilling and softening—freezing makes it too hard to slice smoothly.
Can you make icebox cake with instant pudding?
Yes! Pudding thickens beautifully and adds flavor layers. Swap whipped cream with vanilla or chocolate instant pudding—or combine both.
Wrap-Up: Icebox Cake Is Where Nostalgia Meets Trend
In a city like Austin, where tex-mex aromas mix with food truck experiments, it’s easy to chase the next shiny trend. Yet the humble icebox cake, with its roots in mid-century Americana and fast TikTok-friendly transformations, proves old-school often knows best.
Whether you’re layering up a chocolate lover’s dream or channeling brighter flavors like lemon or berry, the icebox cake gives you the freedom to riff, remix, and refresh your dessert game. And when it’s as effortless as stacking cookies and whipped cream, what’s not to love?
So next time you want something cool, quick, and celebratory? Let your fridge do the baking—and let your guests gather around every creamy forkful.
Enjoyed this walk through comfort and creativity? You might also love diving into my strawberry shortcake twist or whip up a batch of viral raspberry cheesecake for your next sweet craving.
Print
The Irresistible Charm of an Icebox Cake: A No-Bake Dessert Classic
- Total Time: 4 to 6 hours
- Yield: 1 cake (8-10 servings) 1x
- Diet: Vegetarian
Description
A classic no-bake dessert layered with whipped cream and graham crackers or wafers. Creamy, nostalgic, and endlessly customizable.
Ingredients
2 cups heavy whipping cream
1/4 cup powdered sugar
1 tsp vanilla bean
1 box graham crackers or chocolate wafers
Optional: sliced strawberries, bananas, lemon zest, caramel drizzle, espresso powder, gingersnaps, pumpkin puree
Instructions
1. Whip cream, vanilla, and sugar together until stiff peaks form.
2. Spread a thin layer of whipped cream on the bottom of a loaf or square pan to anchor.
3. Add a layer of graham crackers or wafers.
4. Spread whipped cream over the crackers. Add fruit or flavoring if desired.
5. Repeat layers at least 3 times, finishing with whipped cream on top.
6. Optional: garnish with shaved chocolate, crushed pretzels, or cookie crumbles.
7. Cover tightly and refrigerate at least 4 hours or overnight.
8. Use a serrated knife dipped in hot water for clean slices.
Notes
Experiment with flavors like Kahlúa, lemon curd, or pumpkin spice.
Use gluten-free or dairy-free alternatives as needed.
Best texture develops after overnight chilling.
- Prep Time: 15 minutes
- Cook Time: 0 minutes
- Category: Dessert
- Method: No-Bake
- Cuisine: American
Nutrition
- Serving Size: 1 slice
- Calories: 280
- Sugar: 16g
- Sodium: 180mg
- Fat: 20g
- Saturated Fat: 12g
- Unsaturated Fat: 6g
- Trans Fat: 0g
- Carbohydrates: 22g
- Fiber: 1g
- Protein: 3g
- Cholesterol: 45mg
Keywords: icebox cake, no-bake dessert, whipped cream, summer treat