Disclosure: This post may contain affiliate links. As an Amazon Associate, we earn from qualifying purchases—at no extra cost to you.
Maple bars aren’t just pastries—they’re edible nostalgia. If you grew up somewhere between the West Coast and the Midwest, you probably remember grabbing a maple bar after school or on lazy weekend mornings. In Georgia, they were a rare but magical treat—something I’d always look forward to if we happened to pass by a proper doughnut shop on a Sunday trip.
Now, as a 61-year-old chef in Austin, I still find myself craving those golden, fluffy rectangles with their caramel-hued maple glaze. But here’s the kicker: I’ve figured out how to make MAPLE BARS at home without fuss—and trust me, they taste just as good, if not better, than the ones from the bakery. In this post, we’ll walk through the story, ingredients, baking tips, and a few expert tricks I learned the delicious way.
Whether you’re revisiting a childhood favorite or discovering this treat for the first time, prepare to fall in love with maple bars all over again.
The Heart and History Behind Maple Bars
What Are Maple Bars, Anyway?
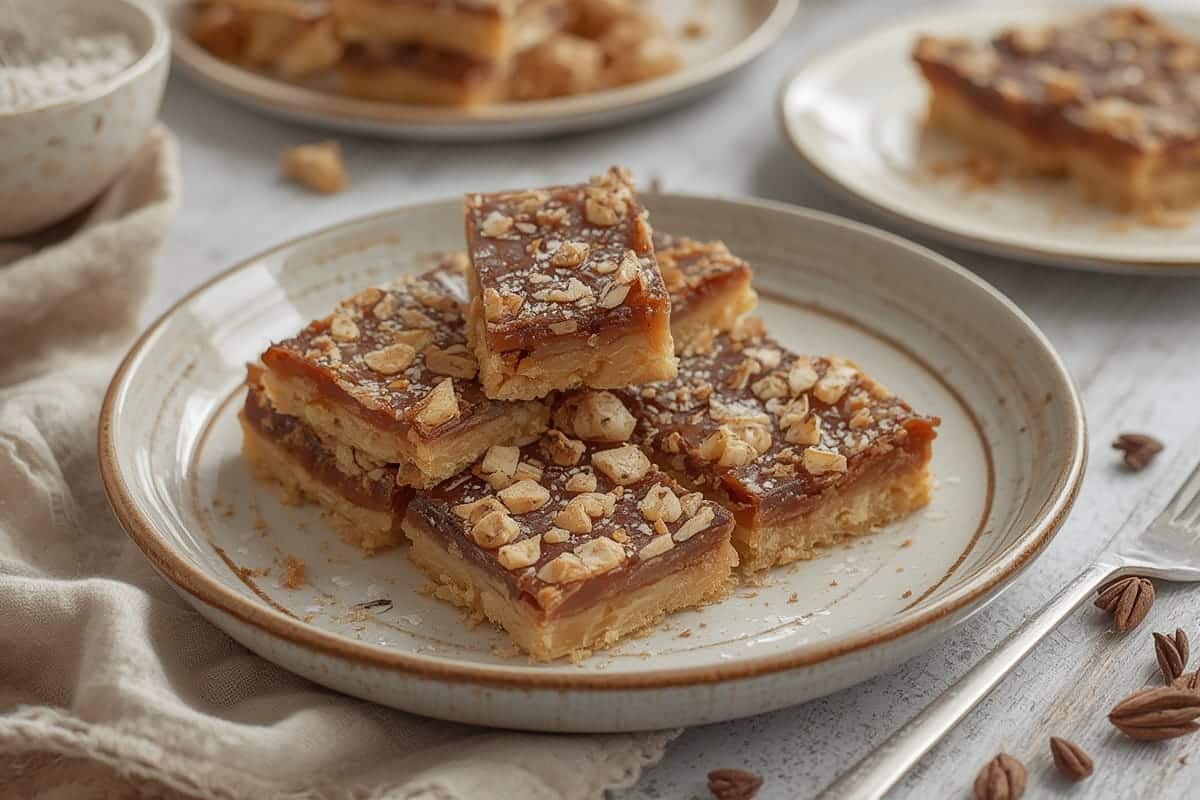
Let’s start with the essentials. Maple bars are long, rectangular yeast-risen doughnuts topped with a smooth, flavorful maple glaze. Think of them as cousins to eclairs or Boston creams—but instead of chocolate, you get that sweet, earthy maple flavor coating a fluffy, golden base.
These pastries are especially popular in the Western U.S., particularly in California and Washington. Unlike standard round doughnuts, the bar shape is memorable, and the glaze has a rich depth that makes them downright crave-worthy. The beauty? You don’t need a bakery to enjoy them fresh. Making maple bars from scratch is easier than you think—and even more satisfying.
My First Bite and Why It Still Matters
The first maple bar I ever had came from a little mom-and-pop bakery in Birmingham, Alabama. I must have been ten. I remember seeing this golden pastry on the counter, its surface gleaming under a layer of glossy maple glaze. One bite, and I was hooked.
Years later, while working in a tight New Orleans kitchen, I revisited this treat. I played around with glazes, tweaked doughs, and today I’ve landed on a recipe that’s pillow-soft with just the right sweetness in that signature maple topping. It’s become a family Sunday favorite and a sure way to start your morning with something indulgent and special.
And if you’ve got leftover glaze? You can drizzle it over no-bake pies—yes, it’s that versatile.
Homemade Maple Bars: From Pantry to Pastry
Ingredients List
Making these sweet stunners at home starts with a few basic ingredients. Here’s everything you’ll need for the dough and glaze, along with some smart substitutions.
| Dough Ingredients | Maple Glaze Ingredients |
|---|---|
| 2 ¼ tsp active dry yeast | 1 cup powdered sugar |
| ¾ cup warm almond milk | 2 tbsp unsweetened maple syrup |
| ¼ cup vegetable oil | 1 tbsp plant-based milk |
| 3 tbsp cane sugar | ½ tsp natural maple flavoring (alcohol-free) |
| 1 tsp salt | Pinch of salt |
| 2 ¾ cups all-purpose flour | 1 tsp tahini (opt, for nutty depth) |
For a gluten-free version, replace flour with your favorite cup-for-cup blend. You can also try this non-stick silicone dough mat for flawless shaping and no fuss.
Timing Breakdown
The beauty of maple bars is they don’t take all day. From start to finish, you’re looking at about 90 minutes, including rise and rest time.
- Prep time: 20 minutes
- First Rise: 1 hour
- Frying Time: 10 minutes
- Glazing & Cooling: 10 minutes
- Total Time: 90 minutes
That’s about 20% shorter than most bakery-style yeast recipes—which can take 2+ hours. Bonus: they’re perfect for weekend brunches or unexpected guests.
Step-by-Step Instructions
- In a large mixing bowl, dissolve yeast in warm milk. Let it sit for 5 minutes until foamy.
- Stir in sugar, oil, and salt. Then gradually add 2 cups of flour, mixing well using a wooden spoon or dough hook. Add remaining flour as needed.
- Knead the dough for about 8 minutes until smooth. Cover with a damp cloth and let it rise in a warm spot for 1 hour.
- Gently punch the dough down and roll it into a rectangle about ½ inch thick. Cut into bar-shaped strips—about 4 inches long.
- Heat neutral oil to 350°F in a heavy-bottomed pan. Fry each bar 1-2 minutes per side until golden. Remove and drain on a rack or paper towel.
- For the glaze, whisk powdered sugar, maple syrup, non-dairy milk, salt, and flavoring until smooth. You can also use this drip-free measuring cup to pour precisely.
- Dip each warm maple bar top-down in the glaze. Let set on a cooling rack. Extra glaze? Drizzle over oatmeal or quick pie recipes.
Want extra shine and depth in your glaze? A pinch of baking soda blended in enhances the sheen and smooth finish. According to USDA flavor profiles, natural maple contains complex compounds—so pick pure maple flavor over synthetic for the best taste.
Fry Worthy: Tips to Nail Maple Bars Every Time
Fried vs. Baked: Which is Better?
So, are maple bars fried or baked? Traditionally, they’re fried—and that’s how we do it here. Frying gives them a golden caramelized crust and soft, airy interior that’s tough to replicate in the oven. But if you’re cutting back on oil, air frying or oven baking at 375°F for 12–15 minutes works in a pinch.
To amplify the crunch while reducing oil absorption, blot the bars gently right out of the fryer. Using a reusable cooling rack keeps them from steaming on the bottom.
Best Kind of Maple Syrup for These Bars
Not all syrups are cut (or tapped) the same. For the best maple glaze, go for Grade A Dark or Very Dark pure maple syrup—it’s got bold, robust flavor made for baking.
Avoid pancake syrups or corn syrup impersonators at all costs, as they lack the deep, woodsy notes real maple adds. Look for organic options with no additives and ideally from local producers. If you want to save time, pre-blended glazes with tahini-maple notes are trending—pair that with this handheld milk frother to whip your glaze into creamy perfection.
Sweet Additions & Preserving the Magic
Flavor Twists and Custom Toppings
Maple bars are a blank canvas. Once you’ve got the basics down, explore add-ins like crushed pistachios, cinnamon-sugar sprinkles, or a light dust of toasted coconut.
Want a savory-sweet twist? A sprinkle of smoked paprika in the glaze adds depth (just a touch, though). I’ve even experimented with tahini glaze and cardamom, and it’s surprisingly delightful.
For serving, try placing a maple bar alongside layers of chilled cream pie or fruit compote for a visually rich dessert platter.
Can You Freeze Maple Bars?
Absolutely. Let them cool completely, then wrap individually in parchment and store in airtight freezer bags. They’ll keep up to 2 months. When ready, thaw in the fridge overnight and reheat in the oven at 350°F for 3–5 minutes before glazing.
To avoid soggy bottoms post-reheat, elevate them using something like this oven-safe cooling rack. Want to go full pro? Pack them in a doughnut display box before sharing.
This method saves precious time and reduces waste—especially if you’re making a batch ahead for brunch events or potlucks.
FAQs
What is a maple bar donut?
A maple bar is a rectangular, yeast-risen donut, typically fried and topped with a maple glaze. It’s known for its airy texture and sweet, woodsy maple flavor.
Are maple bars fried or baked?
Traditionally, maple bars are deep-fried to give them a light interior and slightly crispy outside. However, some prefer baking them for a lower-fat version.
Can maple bars be frozen?
Yes, you can freeze maple bars. Wrap them well and store in an airtight container for up to 2 months. For best results, glaze after reheating.
What maple syrup is best for baking?
Grade A Dark or Very Dark pure maple syrup is ideal for baking. It offers a robust, less processed flavor that shines in desserts like maple bars.
Conclusion
There’s something delightfully old-school about maple bars—and something wildly satisfying about making them from scratch. From their golden crust to that silky maple glaze, these pastries offer a perfect blend of texture, sweetness, and comfort.
With just a few pantry staples and a little time, you can recreate the doughnut shop magic in your own kitchen. So roll up your sleeves, stir up that glaze, and let your house fill with the smell of warm maple spice. Trust me—it’s worth every delicious bite.
PrintHomemade Maple Bars
- Total Time: 90 minutes
- Yield: 10 bars 1x
Description
Golden, fluffy maple bars topped with rich maple glaze. A classic donut shop favorite made right at home.
Ingredients
2 ¼ tsp active dry yeast
¾ cup warm almond milk
¼ cup vegetable oil
3 tbsp cane sugar
1 tsp salt
2 ¾ cups all-purpose flour
1 cup powdered sugar
2 tbsp pure maple syrup (Grade A Dark preferred)
1 tbsp plant-based milk
½ tsp alcohol-free maple flavoring
Pinch of salt
Instructions
Activate the yeast in warm almond milk and let foam for 5 minutes.
Stir in sugar, oil, and salt. Slowly mix in 2 cups of flour, kneading gently.
Add the rest of the flour and knead for 8 minutes until smooth. Let rise for 1 hour.
Roll dough into ½ inch thick rectangle. Cut into bars.
Fry at 350°F for 1–2 minutes per side until golden brown.
Make glaze: combine powdered sugar, maple syrup, milk, salt, and flavoring until smooth.
Dip each bar top into glaze and let cool on a rack.
Notes
Glaze just before serving for best texture.
Add crushed nuts or spices for custom flavors.
- Prep Time: 20 minutes
- Cook Time: 10 minutes
- Category: Breakfast
- Method: Fried
- Cuisine: American
Nutrition
- Calories: 280
- Fat: 7g
- Carbohydrates: 46g
- Fiber: 1g
- Protein: 5g
- Cholesterol: 0mg
Keywords: maple bars, homemade donuts, maple glaze, fried dough bars